Not Remotely Kosher Challah

Well, my “brief haitus” clearly turned into something more like a sabbatical. If this blog were a bit of dough, I would say it has been subjected to a lengthy fermentation, and, although now severely overproofed, is being resurrected.

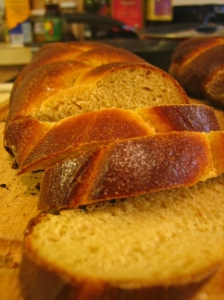
Since I had to roll with my bready momentum lest I risk losing it altogether, I decided to make a straight dough–no messing about with paté fermentée, sourdough, or any other process requiring more than a day’s wait for a preferment. Since a restricted time frame always results in a dough with significantly less flavor development, I decided to go the route of extreme flavor enrichment, and threw just about everything into the bowl, including sweet potatoes and cranberries. Clearly, the Israelites were not noshing on sweet potato cranberry challah during the Exodus, but challah is really only intended to symbolize the gift of food sent down from the heavens during this period of time, and the bounty that rained down on my kitchen on this particular day was of the sweet potato and cranberry variety. And so I threw tradition out the window but maintained the general sentiment of gratefulness for the plentiful foods in my life as I made my not-remotely-kosher challah.

I based my dough upon Hamelman’s challah recipe in Bread–adjusting quantities as necessary to accommodate the liquid content of my ridiculous added ingredients–and just generally mucked about with the recipe to make it a bit more rich. Challah often receives some extra special ingredients during the Jewish New Year (hello, raisins!), and seeing as I was celebrating my new year, it felt appropriate to jazz things up a bit.

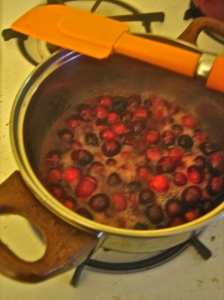
I began by melting 2 3/4 TB butter in a small pot, to which I added all of the cranberries that had overstayed their welcome in my fridge (about 6 oz. in total) along with 2 TB honey. I cooked this pretty red mixture for a few minutes on medium heat until all the little cranberries burst in the middle, looking like so many people around the Thanksgiving dinner table, loosening their belts to accommodate full bellies.

Into my on-loan KitchenAid I deposited the following ingredients, and began to mix:

2 egg yolks

1 whole egg

8 oz. cooked, mashed sweet potato (thanks, mum!)

the entire cranberry/butter/honey mixture

1 1/2 tsp. salt

1 1/2 tsp. yeast

2 oz. water

roughly 22 oz. flour

About halfway through my preparations, I discovered that my yeast was entirely dead from a series of days spent in a broken refrigerator wasteland. It being New Year’s Eve, I spent a cumulative 30 minutes driving from grocery store parking lot to grocery store parking lot, finding each to be a maddening gridlock of angry, hungry procrastinating party-throwers, crazily dashing in front of moving cars and honking at innocent people like myself who just wanted a teaspoon of yeast, in order to find a coveted and aggressively secured parking space. Uttering a string of unsavory, aggravated noises like a lunatic at every junction of every parking lot, I finally realized that I could just drive to my work and ask nicely for a scant teaspoon of the magical stuff so necessary to the success of my bread, but so detrimental to my original sense of calm.

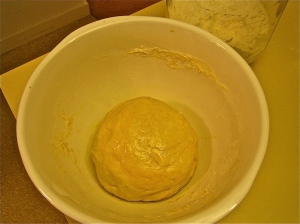
This was the first time I’ve ever kneaded bread dough in a mixer, and when I finally got around to mixing, I found it difficult to judge when I had added enough flour, and when I had mixed the dough sufficiently, without having my hands on the dough the entire time to judge by feel. The dough appeared very sticky initially, and I found myself adding way more flour than I had originally intended, although perhaps I simply misjudged the significant liquid content of both the cranberries and the sweet potato. The dough was ultimately subjected to about 8 minutes under the tyranny of the dough hook before I pulled the distinctly pinkish mass out of the mixing bowl and set it into another bowl to rise. After an hour rising at room temperature, I punched the dough down, covered it, and set it in the now-functioning refrigerator to develop overnight.

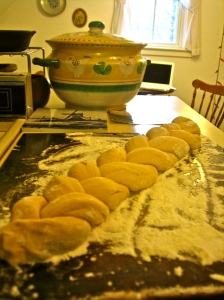
The following evening, I pulled the dough out of the fridge, divided it into four pieces, shaped these pieces into two individual two-stranded loaves, and brushed each loaf with an egg wash before leaving them to proof.

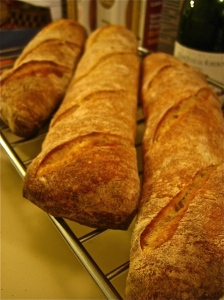
I got a little carried away with hours upon hours of proofing, but the loaves performed just fine in the oven, and baked happily away at 380˚ F for perhaps 45 minutes or so, all the while filling the apartment with the distinct and festive smell of baking cranberries. Using my beautiful new homemade peel (thanks pops!) I pulled the loaves off of the piping hot stone and set them to cool before indulging in a midnight bread snack.

The loaves turned out to be quite large, and could perhaps have benefited from the Jewish tradition of sectioning off a piece of dough to burn in the oven as a gift back to the heavens. (Fun fact: the word “challah” comes from the Hebrew word for “portion,” i. e. portioning off a piece of dough. More neat challah history here.) Instead, I ended up sectioning off a piece of dough to munch on in order to make sure that no great disasters had occurred somewhere in between going crazy with my ingredients and overproofing my loaves. The first slice shocked my palate a bit, as the tartness of the cranberries tricked me into thinking I’d made a sourdough somehow. The sweet potato, although absent in any significant flavor addition, created a lovely moist crumb, and the long proofing period lent the dough a very light and airy quality which was quite pleasant. Next time I would add just a touch more honey, and the balance between sweet and tart would be just right. As it is, I am especially enjoying the tartness when paired with cheese, slathered with butter, or perhaps later made into french toast.

All around, a very enjoyable re-entry into the home bread-making realm, and a nice decadent start to the new year, even if I disregarded a few traditions along the way in favor of using up tasty leftovers.

Zymurgy–get some in your life (or your bread)

I never thought about the possibility of this occurring, but today, I looked up a specific word in my trusty Oxford American Dictionary and it just happened to be the very last word in the dictionary. I felt like I’d won a prize and that bells would start clanging and confetti would rain down on me as my finger rested triumphantly on this famous last word. No such thing happened, but it was somehow a very satisfying experience to have sought out the last alphabetically-ordered word in the English language. I thought it would be an obscure and scientific-sounding consonant cluster like Zzyxglene XZ-2 or something. Instead, it is a pleasant little word that is just as fun to look at as it is to say: zymurgy. And this whole story would be completely irrelevant if not for the fact that zymurgy is the study or practice of fermentation. Which is to say, in a roundabout way, that today’s bread made really excellent use of the fermentation process. So much so that I was inclined to poke around and read more about fermentation, naturally leading me to this excellent word, which is one that I will now almost certainly try to use in conversation at least once in life.

What made today’s bread so delicious was that two fermentation approaches were utilized in one dough. Not only was the signature Reinhart move employed (overnight refrigeration) but so too was a starter used. In this case, the starter was a pâte fermentée, which, unlike a biga or a poolish, is a legitimate and complete bread dough in itself. Since I didn’t have any old leftover dough to pop in my new dough, I made a small fresh batch and let it ferment at room temperature for a good long while (although an overnight in the fridge couldn’t have hurt the flavor). Armed with this bubbling beauty and a plethora of ingredients, I was ready to tackle Reinhart’s Pane Siciliano, which I consider to be the most beautiful loaf in all of The Bread Baker’s Apprentice.

I took my 16 oz. of pâte fermentée, and mixed it up with 12 oz. lukewarm water, 1 1/4 tsp. yeast, 1 TB honey, 2 TB olive oil, 1 1/4 tsp. salt, 8 oz. semolina flour, and 8 oz. bread flour (I ended up kneading in quite a lot more bread flour before the dough felt just right.)

At this point I could already tell that the bread was going to be scrumptious just because it felt so heavenly underneath my palms. I could have carried on kneading all night, but stopped myself after the usual 10 minutes, and left the dough to ferment at room temperature until it doubled.

I took my doubled dough and chopped it into three pieces (with ease, might I add, thanks to the generously gifted dough scraper). I then began the process that attracted me to this particular loaf in the first place: rolling and spiraling!

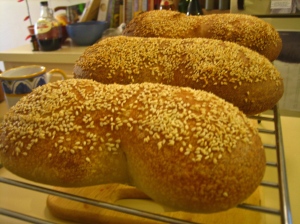
I think I am going to shape every subsequent loaf into a spiral for the rest of my bread making days. It is very satisfying and I suggest you give it a go. I stuck my three scrolls into the fridge after covering them with a bag to retain the moisture, and let the second part of the zymurgy magic take place overnight. When I pulled the dough out of the fridge the next day I found that my bread had somehow over-proofed a bit in my fridge. Instead of nice svelt periwinkles, I had a tray full of chubby rogue snails living life on the edge after having busted through their shells. Apparently, my fridge likes to freeze the mesclun mix on the top shelf, but is happy to provide my bottom-shelf dough with enough balmy weather to induce rapid overnight inflation. Luckily, the over-proofing wasn’t drastic enough to cause deflation, so I quickly sprinkled some sesame seeds on top and popped those snaily monsters into the 450 degree oven.

Before long, the fruits of the fermentation labor paid off, and a beautiful golden crust formed from all of the freed sugars within the dough. The scroll shape got lost in the baking, as I assumed it would after the over-proofing blow-out, but the bread still had a nice oven rise and looked quite lovely.

The crust was thick and crackly and caramel colored and it warmed the cockles of my heart, whatever those are.

If you’ll excuse another etymological tangent, I just happened to glance at the dictionary again to see what it had to say about the cockles of my heart. Instead of finding my answer,  I found that cockle (the verb) means to “bulge out in certain places so as to present a wrinkled or creased surface; pucker.” And wouldn’t you know it, this derives from the French coquiller, which is to “blister [as] bread in cooking.” Well, well, dictionary, you certainly have been most enlightening today. I still don’t know why we refer to the cockles of our hearts (perhaps because cockles are bivalves, and our hearts have valves…?) but I like to think that cockled bread warms my heart anyway.

Cutting into this loaf was quite lovely, as a symphony of crackles was unleashed against the edge of my bread knife. The crumb was light and tender (although a little less lofty than it should have been, again due to the over-proofing) and just begged to be spread with a pat of butter. This I did in short order, and was soon munching on a really, really tasty piece of bread.

I have to say that this is probably my absolute favorite bread so far. I love the flavor of the semolina flour, the gentle contribution of the olive oil, and the delicate sweetness of the double fermentation. The texture was both chewy and soft and the crumb was so moist. The sesame seeds were an excellent added crunch, but the real star of this loaf was the flour itself. If I ever doubted before, I certainly won’t again–time is the most important element in creating a delicious loaf of bread. When in doubt, ferment! (Or zymurgize?)

Let them eat brioche!

Forgive me, history buffs. I’m going to hop on the misinformation train and rehash Marie Antoinette’s catchy but probably completely bogus little phrase “let them eat cake,” or, as in my favorite Gary Larson cartoon version, “I said, ‘let them eat cake and ice cream!'” Sure, she probably never said it. Especially not in English. But, somewhere in history, that fun little phrase cropped up, and regardless of its misattribution, or complete fabrication, the English translation got all mixed up. Whoever was trying to solve France’s hunger problem with a zippy one-liner actually said (so they say) “let them eat brioche.” Brioche occupies a happy little space somewhere between bread (of which the peasants had none) and cake, or pastry. I suppose this means that it’s slightly less offensive to snarkily offer up brioche as a solution to the hunger of the masses than it is to offer cake. However, the more money in one’s pocket, the more butter in one’s brioche, making this a universally eaten but not a universally rich foodstuff. According to Peter Reinhart, a “poor man’s brioche” was only 20-25% butter, whereas as a “rich man’s brioche” was upwards of 70% butter.

What I made today would qualify as a poor man’s brioche by these standards, weighing in at exactly 25% butter. Just as I got to feeling sad for the poor men and their butter-deficient brioche, I tried a nibble. I’m not sure what kinds of taste buds these folks had, but 25% butter was pushing even my butter limits, and I consider myself to be way beyond the realms of the butter tolerant. What’s more, I had enough trouble hand mixing this “small” amount of butter into my dough, and I can only imagine those poor French bakers, without the help of a nice retro-blue Kitchenaid, trying to hand knead a dough composed of 70 or 80% butter.

The recipe I used today comes from Linda Dannenberg’s exquisite and endlessly tempting Paris Boulangerie-Pâtisserie–a book that is on loan to me and that makes me want to buy a one-way ticket to Paris every time I open it up. This pain brioché recipe comes from Bernard Ganachaud of La Flute Gana boulangerie in northern Paris. I cut the recipe in half, and measured in ounces rather than grams.

To begin, I mixed 1 tsp. yeast into 1 TB warm water while I heated up 3 oz. milk. In a bowl, I measured out 8.8 oz. all-purpose flour. I made a well in the flour and poured in the milk and the yeast mixture, as well as 3/4 tsp. salt, 1 large egg and  3/4 tsp. vanilla sugar (I had no vanilla sugar, so I followed the instructions and added 3/4 tsp. sugar and 3/8 tsp. vanilla). It was at this point that one step went very wrong, and one step went very right.

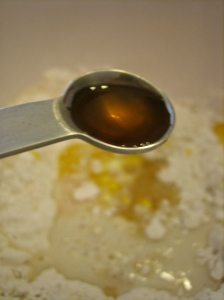
First, my large egg, which was previously sitting happily on my countertop, decided to succumb to some odd horizontal gravitational force, and rolled at least a foot across my counter before the more legitimate vertical gravitational forces facilitated a nice downward fall and a satisfying splat. This wouldn’t have been terrible if I had just scrapped the egg and grabbed a new one out of my fridge. Instead, I thought that the shell had remained intact enough to be salvaged, and I scooped it up, finished cracking it open, and added it to my dough. As soon as I did this, I looked on the floor and realized that a pretty substantial amount of egg white had sneakily leaked out, and that my dough would probably suffer from this small but important lack of moisture. Nevertheless, for some reason, I didn’t try to accommodate for this blunder. Hmm. Possibly because I was too distracted by the next happy event that occurred: I opened up my brand new bottle of Tahitian vanilla extract, having come straight from Tahiti itself, courtesy of my generous big bro. The hue was a rich golden amber, the liquid was almost as thick as a syrup, and it smelled like heaven. I wanted to tipple from the bottle, but remembered my own (and everyone else’s) disappointing childhood discovery that vanilla is not really for lone consumption.

Giddy on the fumes of this lovely stuff, I gave the dough a rough mixing with my fingers, and of course found that it was a bit too dry. Clearly I didn’t have the presence of mind to crack open a new egg and lend a little more egg white to the mixture. Instead, I moved on to my next step, which was to combine 2.2 oz. soft butter with 1.6 oz. granulated sugar. I then added this to my overly dry mixture, bit by bit, until it came together into something resembling a dough. The whole thing then went into the fridge after sitting out at room temperature for a little over an hour. In retrospect, I know that I didn’t really execute this whole thing properly–I didn’t knead enough at either stage to get a properly soft and elastic dough ball, but tried to make up for this with a brief kneading session this morning when the dough came out of the fridge. I’m not really sure what I was thinking at the time, but all’s well that ends deliciously.

The dough sat at room temperature this morning for about an hour, at which time it decided not to do much at all, and I was afraid that I hadn’t developed the gluten enough during my vanilla-induced haze for the yeast to work its magic. I forged ahead fearlessly, and began forming my dough into brioche à tête using a muffin tin instead of the pretty little fluted tins, which are absent in my kitchen. These rotund little fellas with their small dough heads got a quick egg wash, and spent some time in my 350 degree oven.

After maybe 15 or 20 minutes, the coils on the roof of my oven had toasted the little guys’ heads pretty seriously and so I pulled them out, the larger body of the dough thankfully having finished baking too. Miracle of miracles, they still puffed up nicely despite my less than superb dough handling.

To keep myself from popping a piping hot brioche straight into my mouth, I put some espresso on to brew while I waited for things to cool off. I definitely wasn’t expecting magic when I took my first bite of the shiny brown brioche nubbin, having felt pretty skeptical about my treatment of the dough the night before. However, my first bite was pretty darn exciting. To begin with, there is something very satisfying about eating that little round top bit–it just tears off so nicely and is cute and bite-sized and tantalizing. I wasn’t so surprised about this fun-factor, though. It was more the actual flavor of the dough that played a belated April fool’s joke on me. The bread looked ok, but it wasn’t as soft and fluffy and rich as I imaged a brioche might appear, and so I just assumed that the flavor would follow suit and be a bit boring. I also thought it would be a bit chewy from a late kneading. Considering the amount of butter, sugar, and milk that went into the dough, I suppose I shouldn’t have been surprised, but the flavor was absolutely delicious! There was a nice soft crunch on the crust, and the crumb was as moist and tender as the day is long. I kept tasting the dough trying to put my finger on what made it so pleasing, and I finally realized that it was the vanilla that kept cutting through the richness of the butter and the sweetness of the sugar to put on a private show for my taste buds. The flavor of the vanilla had a depth and complexity that I’ve never experienced before, and that held up spectacularly through the whole ordeal. Paired with a fresh cup of espresso, this was a pretty serious way to wake myself up on a lazy Sunday morning.

Whether or not anyone actually suggested that the hungry French peasants eat brioche in lieu of normal bread, I can see how this would be a bit of a kicker–who wouldn’t want to eat butter drenched sweet breads shaped like little round people if given the choice?

The name game–vaguely Victorian bread

“Here is your plate of green stuff, sir, and here is your bowl of warm mushy vegetables in water.”

“Ah, yes, thank you very much. For my entree I think I would like the ribs of the cow please.”

“Very well, that will come with a side of cooked cereal grain, and I will refill your glass of musty juiced grapes in just a moment.”

I suppose it makes a lot of sense that we don’t speak about food so literally, there being a pretty staggering number of edible items to distinguish between, but sometimes I wonder a bit about the names we come up with for the things we ingest. For example, the recipe I looked at for today’s bread is entitled “Victorian Milk Bread.” I am sure that the Victorians loved putting loads of milk in their bread, and that the S-shape of this particular loaf may have been popular at the time, but I don’t think that I was really reliving the Victorian glory days when I mixed together these few simple ingredients and let them ferment. Sure “Victorian Milk Bread” sounds much better than its generic brother “Blah Bread from Nowhere,” and it conjures romantic images of ladies with fans at fancy parties munching on milky bread. And while there are certainly very many legitimately named historical breads, I think if we are being honest here, the Victorian ladies probably weren’t nibbling on this particular loaf.

Perhaps I’m completely off base, and I have just verbally defiled a sacred and historic bread formula. Or perhaps we really do just feel a burning desire to whip out our thesauri and pull vaguely historical names and foreign sounding terms out of chef’s caps when we whip something up in the kitchen. After all, making and eating food is an art, and naming it might as well be an art too. Either way, as a kid who wanted each piece of broccoli named after a tree before it could be consumed, I am really in no place to judge. Also, this bread tastes really good, so Victorian or not it is a worthwhile endeavor.

This lovely loaf came from Bread by Eric Treuille &Ursula Ferrigno (and I mean no disrespect to these brilliant authors in my namemongering!)

I cut the recipe in half in order to avoid having great excesses of bread such as those that kept me from making more bread this last week. I also gave this dough the Reinhart treatment as I am wont to do these days. Last night, I mixed together:

1 tsp. yeast

1/2 tsp. granulated sugar

6 oz. warm-ish milk

3/4 tsp. salt

9 1/2 ish oz. bread flour

I kneaded this soft ball of dough for nearly ten minutes, as it grew only softer and more pleasant to handle. This supple quality was most directly due to the dairy, but I would like to think that my new Bob’s Red Mill flour added some magic to the mix.

The sugar that is added to this dough is almost negligible, so the milk is the only real enrichment. Although milk is certainly flavorful, it is not overwhelming and it affects the texture of the bread more than the flavor. What this meant to me was that it would still be important to draw out as much flavor from the flour as I possibly could–something that is not often as important in enriched breads. With this in mind, I departed from the recipe’s procedural guidelines and stuck the dough in the fridge overnight for a nice slow fermentation.

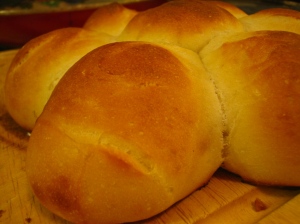
As per usual, I took the dough out of the fridge after work today and let it finish doubling in size at room temperature. Once the dough had become nice and lofty–a process that took a few hours–I began shaping. It was at this point that I decided to give my bread further fodder for an identity crisis by abandoning the Victorian S-shape. I really wanted dinner rolls, and I could tell that this supple puffy milky dough really wanted to be made into dinner rolls too. So I listened, and I rolled a bunch of little dough balls into a happy dough ball family that proofed nicely into a bigger dough ball family in about 45 minutes.

After a nice little vacation in my 375 degree oven, the dough ball family returned all tan and beautiful, smelling pleasantly.

In a very satisfying little maneuver, I tore off a hunk of bread and saw a dreamy, steaming interior, the likes of which I envisioned when I jumped ship on the S-shape idea in favor of dinner rolls.

They tasted dreamy too–a really excellently developed wheat flavor balanced by a mild yeasty kick, all wrapped in the warm embrace of soft fluffy milk magic. A little salted butter melting into the beautiful network of tiny air holes was really excessive and delicious. So delicious, in fact, that I was seized with the sudden urge to flip through my thesaurus and to google vaguely historical reference points in search of the perfectly noncommittal epithet.

“I brought you flours”–an experimental semolina soy bread

After last week’s buttery indulgence, the Lady Justice of all things culinary was standing sternly before me balancing her scales, one side weighed down heavily with a plethora of croissants, the other side floating aimlessly above. I felt compelled to bring balance to my kitchen, and set to work creating a very ordinary and healthful loaf in which not a single pat of butter appeared. Still having vast stores of random flours from my latest Reny’s binge, I selected soy flour and semolina flour as my subjects for experimentation, encouraged by their nutritious benefits. Soy flour in particular packs a punch with protein, fiber, iron, and even some vitamin C. Lady Justice smiled upon me. Since soy flour lacks gluten, I thought semolina flour would be an appropriate addition, being rich in gluten itself, and hoped that their flavors would combine well. My only slight indulgence was a minuscule dollop of molasses, a flavorful sweetener that I thought might positively complement the nuttiness of the flours.

I ended up with the following amounts of hodgepodge ingredients:

8 oz. lukewarm water

1 tsp. yeast (I would use just a touch more next time)

1 TB molasses (also could use just a bit more)

3 oz. semolina flour

2 oz. soy flour

9 oz. white wheat flour

1 1/2 tsp. salt (next time just a dash more)

I mixed and kneaded, and applied my Reinhartian principles (by which I mean I stuck it in the fridge for an overnight delayed fermentation).

In the morning, I took the dough out of the fridge, went back to bed, and when I next arose after a leisurely morning snooze, the dough had magically finished doubling in size. I then decided to play a little trick on Lady Justice, and set to work making my loaf look decadent, even though it wasn’t going to taste decadent. Really, it was just an excuse to try out my braiding technique.

I’ve been eagerly awaiting the chance to make a braided loaf for ages, but haven’t yet had an appropriate opportunity. I should have waited until I tried making challah, but I couldn’t resist the urge, and started braiding my very plain dough.

My elementary school french braiding technique came flying back to my fingers, and a doughy plait emerged. I let it sit and proof for about an hour before making another deceptively decadent-looking addition by slathering the top with an egg wash. I popped the whole thing into my 400 degree oven–using a slightly lower temperature than usual because soy flour is said to brown rather easily. After about 20 or 30 minutes, I pulled the braid out of the oven, and my eyes were duly deceived by the beautiful finish that disguised my ordinary loaf.

At this point, I wished that I’d been as honest as Sarah, Plain and Tall, and made this bread look like Semolina Soy Loaf, Plain and Lumpy. Instead it looked like Challah, Sweet and Eggy. Before I took my first bite I had to barrage my brain and taste buds with little reminders as to what to expect. Once I was able to shut out the visual, I was relatively pleased with the simple and light flavor that met my palate, although as I mentioned previously, it could have used just a touch more molasses and perhaps another little dash of salt. It was very pleasantly moist and ever-so-slightly chewy, with a denser crumb and nice crunchy crust. The flavors of the soy and semolina flours had a nice subtle presence, adding a nutty and rich depth of flavor without putting down a flag and claiming my palate for its own. A little extra yeast in the dough would have more fully expanded all of the glutenous strands made by my high gluten flour additions, but as it was, the denser crumb was actually quite pleasant.

All in all, a very ordinary and simple, yet tasty and nutritious bread to level the balances. If only I hadn’t confused my hungry eyes–it’s no wonder that Lady Justice is blindfolded.

Holy croissants, Batman–a study in butter

First of all, I said I would leave Peter Reinhart’s recipes alone for a while, and I lied. Secondly, I said that croissants lived in the “scary pastries” category of my baking brain, and that is now also a lie. Two falsehoods, yes, but of the most delicious variety.

After tackling my irrational fear of bagels, I figured I might as well pull another monster into the light and try my hand at croissants–my fear of which seemed a little more conspicuous and rational. After all, croissants require a French accent for correct pronunciation and are known to inspire fits of euphoria when made well. There’s something about all those buttery layers that inspires a sense of unsurpassable culinary intimidation. Of course, with my trusty Artisan Breads Every Day, the only seemingly unsurpassable challenge was getting over my guilt of publicizing one too many Reinhart recipes–a guilt that I am assuaging by telling you that my sophomoric explanations of these recipes in no way equate to actually owning this book!

Not to be deterred by the 7 page recipe, I began making the dough, or the detrempe, last night. This consisted of mixing 21 oz. flour, 1 3/4 tsp. salt, 1/4 cup sugar, 1 TB yeast, 7 oz. milk, 8 oz. water, and 2 TB melted butter. After a very brief mixing, the sticky, rather awkward looking dough went straight into the fridge for the night. It was hard to imagine a sleek, French-ish pastry emerging from such a sight, but I put all my eggs in the croissant basket, as it were, and carried on unphased.

I left three sticks of butter out overnight in preparation for the aptly named butter block. Since I don’t have a mixer, I knew I would need the butter to be a bit softer than it probably should be, enabling me to manipulate it into block shape more easily with my hands. When I got home from work today, I set to work making this square of fatty doom. I stuck the three sticks of butter into a bowl with 2 TB flour and squished sickeningly away with my fingers until everything was nice and pasty and my hands were sufficiently moisturized. I then formed the paste into a 6″x6″x1/2″ square, which was great fun. I couldn’t find any measuring devices, so I used my squint-and-guess ruler.

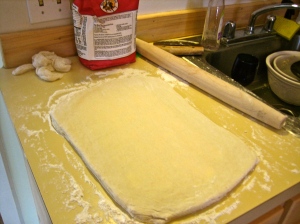
I then pulled the dough out of the fridge, rolled it into what I guessed to be (and probably was nowhere near) a 12 1/2″x6 1/2″ rectangle, and laid the butter block on top.

Then began the “laminating” process, in which the butter and dough became very intimately acquainted through a series of fun little folds. This has to be the most thoroughly entertaining kitchen technique ever. I began by sealing my little butter love letter in the big doughy envelope.

I then attempted rather clumsily to roll this out into a 16″x9″ rectangle. I found it difficult to enforce even butter distribution, and to maintain 90 degree angles at the corners of my dough, but I ended up with something roughly rectangular and buttery.

Then the first really fun step took place, and the whole unit was folded up like a fancy business letter–turning 3 layers of butter and flour into 9 layers.

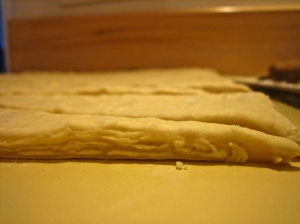
This fatty layered fellow then rested for a while before being rolled back out into another big rectangle. The rectangle was again folded letter-style, making the 9 layers of love transform into 27 even thinner layers. After one more rest for the dough, the final letter-fold took place, and 81 layers of pure fat and doughy fat were nestled together ready to go to croissant town after a little nap. The little buttery bits were visible through the translucent top layer of dough, and were most tantalizing.
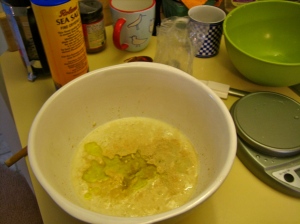
I rolled the dough out into an even bigger rectangle than before, and began cutting out elongated triangles–all of which turned out quite unevenly without a proper measuring stick, and would probably make any self-respecting Frenchman gasp with horror. I didn’t care about that so much as I cared about being able to see all of the beautiful layers revealed in the cross-section of the dough, once cut. A health hazard in the making, but so very pretty.

I rolled up each lumpy triangle, and let them proof for a little over 2 hours. They looked like silly little slumbering creatures on my countertop.

While I got things heated up, I brushed each little fellow with an egg wash, and then popped a select few into the 375 degree, magic-rendering oven (while the others went straight to the freezer for safe keeping). Twenty or thirty minutes later, the golden crescents emerged from the oven in a pool of bubbling butter, and it was at that point that I was slightly disgusted, and also slightly pleased. On the one hand, there was enough butter in each croissant to singularly create an entire batch of cookies. On the other hand, they looked like croissants and that was rather nice.

I confidently ignored the pool of butter and eagerly cut the first sucker open, also ignoring the fact that they were still internally hotter than the sun, and should be left alone to cool and finish baking. My heart melted just like all the butter I was about to ingest when I glanced inside my first croissant.

I closed my eyes in order to bypass my more health-aware observation systems, and took a heavenly first bite that unleashed a plethora of happy sensations. The outside crunched between my teeth like a good crispy snowfall crunches underfoot, only with 3/4 lb. more butter. The buttery, light, flaky exterior yielded a soft, yeasty and slightly chewy inside, and then the first croissant was gone.

Next time–and there will most certainly be a next time–I hope to achieve a more uniform, thin, and less lumpy lamination so that more butter stays in, and less leaks out in the baking process to remind me of exactly what I am eating. I also am going to try to handle the dough even less so that the inside dough is just slightly less chewy, and more all-around light and flaky. I am not sure what a French person would say about these particular pastries, but I know what I say about them, and that is “yum.”

Let the wild (sourdough) rumpus begin!

They say that necessity is the mother of invention, but you can easily substitute the word  “leftovers” or “skepticism” for the word “necessity” and get the same result. I had an abundance of leftovers and skepticism so I was well poised for some inventing. I had to nourish my neglected sourdough starter last night, which left me, as usual, with about 8 oz. of uncertainty. I also had quite a bit of rapidly browning rosemary, half of a forgotten onion in the nether regions of my fridge, and some nice plump tomatoes. So, after a pleasant romp through some new and exciting bread books, I was back to haphazard experimentation with discarded sourdough bits.

A few weeks ago I began my sourdough starter according to the instructions in Bread Alone, but somewhere along the way I’m pretty sure that I flubbed up my proportions and no longer feel comfortable following the book’s sourdough formulas, as the hydration of my starter is likely a far cry from its intended state. This has left me with sourdough avoidance and guilt. When I removed 8 oz. of the starter last night, I replenished the remaining goo with more flour and water and put it back in the fridge with much lingering doubt. I threw 4 oz. flour and 1 oz. water into the starter that I had removed until it resembled something a bit stiffer but not too stiff (as Bread Alone instructs), and I left this on the counter to bubble, hoping that some disaster might befall it so that I could avoid using it altogether.

By the time I got around to thinking about using this intimidating mass of dough, I quite simply didn’t want to, and I put it in time-out in the fridge overnight. Then, the next day, with renewed Yankee thriftiness bolstered by guilt-inspired confidence, I decided I should man up and make an experimental loaf of sourdough something.

Here was my mind set behind the decision to make a sourdough focaccia: focaccia is flat and is supposed to look all knobby. It is also supposed to have tasty things scattered on top of it. If the dough is a failure and it comes out all flat and knobby, that is just superb. Even better, it has toppings behind which it can hide.

So, armed with a plethora of leftovers and a generous portion of skepticism, I began mixing up a dough. Since focaccia is typically a stickier dough with a higher water to flour ratio than, say, French bread, I was careful not to overdo the flour. I took my starter and mushed it up in 8 oz. water. I added 1 tsp. yeast because I wasn’t sure how potent my starter would be after all that neglect. Then I added 1 tsp. salt, 1 tsp. sugar, and 2 TB olive oil–the key to a nice soft focaccia. I ended up adding in just a little over 12 oz. flour, putting the dough at around 65% hydration–just where a focaccia should be, according to Mr. Reinhart.

Since the dough was pretty sticky, I kneaded for a brief time, and then tried ye olde stretch and fold technique again. I stretched and folded, waited ten minutes, and repeated the procedure a few times until the dough had firmed up a little.

It was still sticky, but now manageable. I coated the dough in olive oil, and let it rise until it had doubled, which took almost two hours. Then I chopped the dough ball in half and began stretching each piece into an amoeba-esque form. The dough very gladly stretched in every direction the second I picked it up, and probably would have stretched to the floor if I hadn’t stopped it. I didn’t want to over handle the dough, though, because some nice big bubbles had formed that would puff up beautifully in the oven. I then busted out my leftovers and covered each piece of dough with a security mask, in case of impending disaster. Each one received a coating of olive oil and a sprinkle of salt, and one got rosemary while the other got tomatoes and onions.

After a brief proofing of maybe half an hour, I awkwardly transferred the elastic dough onto the 400 degree oven stone, making mutant amoeba shapes even more absurd than before. The loaves cooked quickly because of their thin nature, and after very little time, my ugly duckling dough had turned into beautiful swan focaccia. The air bubbles that I had carefully avoided deflating made a nice little landscape on the surface of the golden bread, and the bottom had crisped up to just the right degree–not nearly enough to break your teeth, but enough to support the loaf and prevent it from buckling.

I ripped off a corner of the steaming loaf and was very pleased to see and hear a really nice crust and crumb. It tore easily and was filled with lofty air pockets. The bread was somehow simultaneously delicate and crispy–a hybrid soft-crunch that was very toothsome and satisfying.

Although I was sort of winging it on the salt, sugar and olive oil proportions, their flavors seemed well balanced, and were out-shined anyway by a slowly developing sourdough flavor that kicked you in the pants after a few moments of munching. I think because I neglected my starter for so long and made it spend the night in the fridge, the sour flavor really developed some strength. I personally enjoy a strong sour flavor on occasion if it is nestled in a nicely textured crumb, but if your taste buds are timid, you’ll definitely want to pay more attention to your starter than I did.

Regardless of your sourdough sensibilities, try experimenting! I’ve been following recipes and formulas pretty closely the last few days and it felt great to mess around and be foolish. Although I didn’t feel comfortable following any prescribed formulas because of my starter’s uncertain hydration levels, any dough that has been fermenting for a while is bound to add flavor and excitement to an otherwise straightforward bread, and should be added to the mix with zeal.

I never met a bagel I didn’t like

I will eat just about any bagel–especially if it is toasted and spread with cream cheese. Even a poorly made bagel somehow tastes better than other poorly made food. It is, of course, quite obvious and pleasing when you feast upon a bagel of the highest order, but I will happily settle for a mediocre bagel in a pinch, and I will probably enjoy it. That being said, I’d never considered making my own bagels. When I pictured bagel making, I imagined mysterious dough formulas, giant vats of swirling boiling water, highly precise temperatures, hours of attention-requiring steps, and all sorts of other scary stuff. I don’t know where I got these notions. For some reason I relegated bagels to the “intimidating baked goods” category of my food brain, along with croissants and fondant icing, never allowing it to reside in the very accessible “bread” category where it belongs. It didn’t really occur to me that if I could enjoy a half decent bagel at the airport, then I could probably enjoy a half decent bagel from my own kitchen. I never bothered to clear up my bagel confusion (until today, of course) and preferred to enjoy their tastiness with a side of mystery and misinformation.

Once again, Peter Reinhart entered the scene, and so on and so forth. (Mr. Reinhart, I promise I will stop sharing your recipes so frequently, it’s just hard to resist!) Once again making life easy and making bread tasty, Reinhart’s signature overnight fermentation cut out at least 50% of the mystery and intimidation that comprised my silly bagel notions. (I used his bagel recipe from Artisan Breads Every Day–an even further simplified and perfected version of the one that appears in Bread Baker’s Apprentice) Ready to apply the same principal of drawing out the most flavor through a long and temperature-reduced fermentation period in the fridge overnight, I began by mixing together the dough.

I combined 1 TB honey (as I had no barley malt syrup), 1 1/4 tsp. dry active yeast (or 1 tsp. instant yeast), 1 1/2 tsp. salt, and 9 oz. lukewarm water. I then mixed in 16 oz. bread flour and began to knead. I hadn’t entirely prepared myself for such a different hydration percentage, and had to remind myself that the dough was supposed to feel this stiff. The higher ratio of flour to water is what makes bagels what they are–chewy and dense and delicious. After a few minutes of preliminary kneading I got into my bagel groove and had accepted the dough for what it was. I then gave the dough a wee rest to pull itself together before a few minutes of final kneading, at which stage it began to feel quite lovely and soft, but still noticeably more stiff than, for example, the dough of a French bread. After an hour-long rise at room temperature, the dough was ready to be manhandled into bagel shapes.

This is where I could sure use some practice. I tried both the “roll into a rope and seal the ends” method of bagel formation, and the “poke a hole in the center and expand” method. I found that I wasn’t particularly gifted at either. No matter which way I shaped, one side was always a bit lumpier than the other, and on occasion, my bagels ended up looking like very thin hula-hoops before I squished them back into recognizable cherubic forms. Regardless, each 4 oz. dough ball ended up bagel-esque.

I brushed these little fellows with olive oil, covered them tightly and stuck them in the refrigerator for their overnight transformation. When I got home from work today, I pulled them out of the fridge, and played the bobbing-for-raw-bagels game. If you stick one of the bagels in a bowl of cold water and it floats, they are all ready to be boiled and baked. If it doesn’t float, you let them proof a little longer and then try again. My little guys were as buoyant and seaworthy as could be, straight out of the fridge, so I got to work boiling some water. At this point, the other 50% of the bagel mystery fell away. No scary and rigid temperature requirements or crazy close monitoring of salinity and acidity levels with test tubes and vials and beeping implements.

The only set-back was that I discovered a nice and steady drip in the bottom of my prized Goodwill purchase–the only correctly sized pot I had for this kitchen experiment. My two alternate vessel choices, aside from welding my leaky pot back together, were either insanely huge or outrageously tiny. I discovered that the insanely huge option, while allowing all of my bagels to boil at once, would never fit on top of my miniature burners, so I went the outrageously tiny route and boiled bagels one or two at a time.

I brought my small pot of water up to a boil, brought it down to a steady simmer, and then added 1 1/2 tsp. honey, 1 1/2 tsp. baking soda, and 1/2 tsp salt (reduced versions of Reinhart’s proportions) to make my “poaching liquid.”

I dropped each bagel in the liquid for a one minute bath on one side, and then flipped it for a thirty second bath on the other side.

After each poaching, I sprinkled a bounty of seeds on top of the now rather sticky little inner tubes, until all six bagels (plus one mini guy) were ready for their final oven treatment.

Sixteen or so minutes later, six (and a half) bread products that actually looked like bagels (much to my surprise!) emerged from my 450 degree oven, all nice and caramelized.

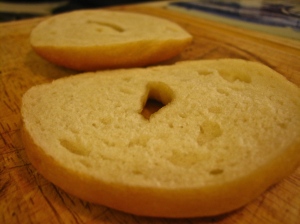
The whole process wan’t remotely intimidating, time consuming, terrifying or disastrous–all of which I had long assumed it would be. It was definitely remotely tasty, and I dare say even quite tasty. On the scale of airport bagel to whatever the opposite of airport bagel would be, these were definitely on the favorable end. The interior was soft and chewy and dense without being brick-like, and the exterior was golden and sweet. Zoom in on the interior!

And zoom in on the exterior!

The body of the bread itself was very flavorful from the long overnight fermentation and from the small amounts of honey and salt, but I couldn’t resist my favorite bagel combination, and I defiled my beautiful new bread with cream cheese. Thank you Peter Reinhart for your bagels, I will now be giving you a break so as to avoid publishing all of your recipes and receiving copyright infringement notices.

Why don’t you put some beer in that bread?

Things that are getting old in my fridge: beer, milk, mozzarella.

Things that are getting old on my counter top: onions.

Ways in which to combine old beer, milk, mozzarella, and onions into a tasty delight: at least one.

What could have been a field day for the critters who scavenge the compost pile turned into a bountiful oven harvest, all thanks to Mr. Reinhart, who saved these foods from their moldy demise with his soft cheese bread recipe from Artisan Breads Every Day. The approach throughout this book really capitalizes on the “delayed fermentation through refrigeration” concept initially presented in his pain a l’ancienne recipe. Every bread made with this method feels like cheating, but in a really tasty way. The overnight refrigerator magic provides every flavor benefit of using a pre-ferment and a long first rise, except you are sleeping while it happens, and you don’t actually have to do any of the work. It’s like watching Emeril take a perfectly baked cake out of oven number two, just seconds after he hurriedly plopped a tin-full of batter into oven number one. If I may quote Mr. Lagasse–“BAM!”

I did a little prep work for this magic trick last night, and followed Reinhart’s recipe (which I halved) for soft cheese bread. In one bowl, I mixed together 14 oz. bread flour, 1 tsp. salt, and 2.5 TB granulated sugar. In another bowl, I combined 4 oz. old refrigerator beer, and 4.5 oz. old refrigerator milk–a blend that really just felt wrong.

I then added 2 3/4 tsp. dry active yeast (Reinhart uses 2 1/4 tsp. instant yeast) to my beermilk to make it even more disgusting. (What’s important in this step is that the liquid is lukewarm so that the yeast has a brief chance to activate before it is put in the fridge to cool–contrary to the directions in the pain a l’ancienne). At the same time, I melted 1 TB butter, and tossed my 3.5 oz. chopped old onions in the melted butter. Reinhart has you mix the onions in later, but I wanted to infuse my butter with oniony flavor so I jumped the gun. Finally, I mixed all of my dry and wet ingredients together, and kneaded for maybe 5-10 minutes until the dough felt nice and smooth, and my hands smelled permanently of onions.

The whole thing went straight into the refrigerator, and I went straight to bed. Then the Nutcracker music began and the little enzymes danced silently onto the doughy stage in the darkness of the fridge to begin their secret work. 17 hours later, I returned home, took the bowl out of the magic cooling chamber, divided my nicely risen dough into two, and set to work using up the old cheese–the last of my salvaged ingredients.

I spread each dough ball into a rectangle and unleashed a torrent of dairy upon them (and perhaps also a little dusting of maple pepper). I then rolled the dough up as one would a cinnamon roll, and sealed the seams. I left one loaf whole, hiding the cheesy innards, and the other I chopped into revealing swirls of cheesy heaven. These I let rise/proof for 1 1/2-2 hours, at which point they were nice and chubby and ready to be baked.

I stuck everything in my 350 degree oven, and 20+ minutes later, the room was flooded with the rich scent of cheesy, bready goodness. BAM! My own kitchen’s Emeril magic, right before my eyes. The little rolls had puffed up beautifully and were golden brown and light as a dream. They popped out of the tin and into my mouth.

Reinhart was holding back a little when he entitled these “soft” cheese rolls. If space had allowed, I’m guessing he would have preferred to call them “aromatic and pretty, alternately sweet and savory, flaky, light and soft” cheese rolls. Personally, I prefer “nearly compostable, but so much more delicious this way” rolls. Truly, every element of these rolls pleased my sensibilities–this isn’t just an enriched bread in which the flavors of the additives dictate the flavor of the whole. This is a bread in which the complex flavors of the flour are unleashed in conjunction with the flavors of the onion, milk, cheese and beer, to create a beautiful crumb, golden crust and a nicely enhanced bready flavor.

I have to say, of all the old leftovers that made their way into this bread, I attribute the greatest accomplishments to the beer–itself a yeasted and bubbly product (and, coincidentally, a home brew). I think from now on, I may tipple a little when I make other breads, in the hopes that a few ounces of beer may find their way into the dough.

Pain a l’Ancienne–a delightful and entirely misnamed bread

Unless modern refrigeration dates back a bit further than I realize, there is nothing “ancient” about this bread formula, as the name begs you to believe. The general principal behind pain a l’ancienne (as relayed to me by my new favorite book in the whole wide world–Peter Reinhart’s The Bread Baker’s Apprentice) is that the dough is made with ice cold water, and is immediately plunked down in the fridge where it remains overnight, effectively putting the kibosh on yeast activation. Because the yeast is napping, the enzymes in the dough can go to work breaking the complex carbohydrates down into simple sugars without interruption. In a dough fermented at room temperature these newly freed sugars would be gobbled up pac-man style by the yeast–which is active because of the warmth–whereas the sugars in the refrigerated dough remain uneaten as long as the yeast slumbers in the cold. When the dough is removed from the fridge the next day, the little yeasties begin munching on all of the sugars, but can only process so much food before baking time. This means that a sugar reserve remains, lending a wonderful rich flavor to the dough and providing fodder for that lovely crust caramelization. Although I am enjoying the image of toga-ed Romans popping bowls of dough into the fridge and fiddling around with magnetic poetry, I’m pretty sure the ancients didn’t chill their dough in this manner, and must conclude that the name is a bit fanciful (Reinhart rightfully suggests that a more appropriate name would be pain moderne).

After reading Reinhart’s first chapter in The Bread Baker’s Apprentice, I was especially intrigued by the pain a l’ancienne. Not only is it clear that this particular “delayed fermentation” method revolutionized Reinhart’s own approach to bread making, but that it would revolutionize (and perhaps currently is revolutionizing) bread making altogether. This sounded like a promising first loaf to try from my treasured new book.

Despite all the talk of revolution, this is an incredibly simple bread formula. It feels almost like cheating to get such seriously excellent loaves with so little effort, but then you get over that guilt and just enjoy eating your bread. So, here it is:

I cut the recipe in half, as it makes approximately six baguettes, and I can only eat approximately one baguette. I can now give away approximately two baguettes.

Last night, I mixed together 13.5 oz white wheat flour (Reinhart says to use bread flour, but I only had all-purpose which has a slightly lower protein content) with 1 1/8 tsp. salt, 7/8 tsp. instant yeast, and 9 oz. ICE COLD water. The recipe calls for 7 or 8 minutes of electric mixer action, as the dough is rather wet. Having no electric mixer, and not being able to really knead as I would with a drier dough, I improvised a hands-in-the-bowl “kneading,” which turned into a hands-in-the-air “agitating,” as the bowl refused to stay in one place and was banging around annoyingly. After looking ridiculous with my air kneading for a sufficient length of time, I wrapped the bowl of dough in a bag (to keep the moisture in) and stuck it in the fridge.

I somehow managed to fiddle with the fridge dial enough to avoid deep freeze, and found a nice ball of dough, somewhat risen and a happy 40 degrees, when I pulled it out of the fridge this afternoon. After 2 1/2 hours in my warm kitchen, the dough had finished doubling in size, and I prepared it for the chopping block.

Careful not to deflate the dough, I divided this blob into three awkardly shaped (or shall I say rustic) loaves, and slashed the tops.

My oven was a toasty 475 degrees when I slid these guys in, and I gave them a nice steam bath to get things going. After 10 minutes I made all the loaves switch places in the oven to avoid the uneven browning that was setting in, and 5 or so minutes later, they emerged all evenly and beautifully caramelized and crackling. I can’t express how satisfying that crackle is to me.

I don’t wish to belittle the quick faux-French baguettes that I made the other day, but there truly is no comparison between that bread, and what I just pulled out of the oven. The natural sugar in these loaves, so cleverly retained through delayed fermentation, formed the most pleasing caramel crust–one that was made thick and crackly by high temperature, steam, and an oven stone. Because the enzymes were given such ample opportunity to deconstruct the flour (18 hours in the fridge) a many-leveled and rich flavor emerged along with a smooth and perfectly chewy texture, with lovely little holes scattered throughout the crumb.

The more I chewed on the bread, the more the flavor and texture crescendoed into a power ballad on my palate. For the first time, I felt like I had produced bona fide bread. For such a simple and logical process, the resulting loaves were so complex, in the best way possible. I was mighty pleased, as you may be able to tell. What I further love about this formula is that, according to Reinhart, this is a great dough base not only for baguettes, but also for focaccia, ciabatta, and pizza. So easy, so versatile, so delicious. With a little olive oil on top and some greens to balance out my outrageously high bread intake, this made a nice little dinner.

Thanks a million, Peter Reinhart!