Not Remotely Kosher Challah

Well, my “brief haitus” clearly turned into something more like a sabbatical. If this blog were a bit of dough, I would say it has been subjected to a lengthy fermentation, and, although now severely overproofed, is being resurrected.

Since I had to roll with my bready momentum lest I risk losing it altogether, I decided to make a straight dough–no messing about with paté fermentée, sourdough, or any other process requiring more than a day’s wait for a preferment. Since a restricted time frame always results in a dough with significantly less flavor development, I decided to go the route of extreme flavor enrichment, and threw just about everything into the bowl, including sweet potatoes and cranberries. Clearly, the Israelites were not noshing on sweet potato cranberry challah during the Exodus, but challah is really only intended to symbolize the gift of food sent down from the heavens during this period of time, and the bounty that rained down on my kitchen on this particular day was of the sweet potato and cranberry variety. And so I threw tradition out the window but maintained the general sentiment of gratefulness for the plentiful foods in my life as I made my not-remotely-kosher challah.

I based my dough upon Hamelman’s challah recipe in Bread–adjusting quantities as necessary to accommodate the liquid content of my ridiculous added ingredients–and just generally mucked about with the recipe to make it a bit more rich. Challah often receives some extra special ingredients during the Jewish New Year (hello, raisins!), and seeing as I was celebrating my new year, it felt appropriate to jazz things up a bit.

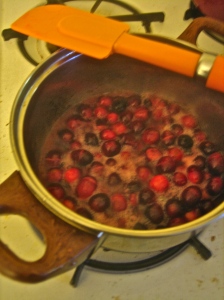
I began by melting 2 3/4 TB butter in a small pot, to which I added all of the cranberries that had overstayed their welcome in my fridge (about 6 oz. in total) along with 2 TB honey. I cooked this pretty red mixture for a few minutes on medium heat until all the little cranberries burst in the middle, looking like so many people around the Thanksgiving dinner table, loosening their belts to accommodate full bellies.

Into my on-loan KitchenAid I deposited the following ingredients, and began to mix:

2 egg yolks

1 whole egg

8 oz. cooked, mashed sweet potato (thanks, mum!)

the entire cranberry/butter/honey mixture

1 1/2 tsp. salt

1 1/2 tsp. yeast

2 oz. water

roughly 22 oz. flour

About halfway through my preparations, I discovered that my yeast was entirely dead from a series of days spent in a broken refrigerator wasteland. It being New Year’s Eve, I spent a cumulative 30 minutes driving from grocery store parking lot to grocery store parking lot, finding each to be a maddening gridlock of angry, hungry procrastinating party-throwers, crazily dashing in front of moving cars and honking at innocent people like myself who just wanted a teaspoon of yeast, in order to find a coveted and aggressively secured parking space. Uttering a string of unsavory, aggravated noises like a lunatic at every junction of every parking lot, I finally realized that I could just drive to my work and ask nicely for a scant teaspoon of the magical stuff so necessary to the success of my bread, but so detrimental to my original sense of calm.

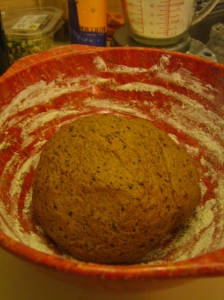
This was the first time I’ve ever kneaded bread dough in a mixer, and when I finally got around to mixing, I found it difficult to judge when I had added enough flour, and when I had mixed the dough sufficiently, without having my hands on the dough the entire time to judge by feel. The dough appeared very sticky initially, and I found myself adding way more flour than I had originally intended, although perhaps I simply misjudged the significant liquid content of both the cranberries and the sweet potato. The dough was ultimately subjected to about 8 minutes under the tyranny of the dough hook before I pulled the distinctly pinkish mass out of the mixing bowl and set it into another bowl to rise. After an hour rising at room temperature, I punched the dough down, covered it, and set it in the now-functioning refrigerator to develop overnight.

The following evening, I pulled the dough out of the fridge, divided it into four pieces, shaped these pieces into two individual two-stranded loaves, and brushed each loaf with an egg wash before leaving them to proof.

I got a little carried away with hours upon hours of proofing, but the loaves performed just fine in the oven, and baked happily away at 380˚ F for perhaps 45 minutes or so, all the while filling the apartment with the distinct and festive smell of baking cranberries. Using my beautiful new homemade peel (thanks pops!) I pulled the loaves off of the piping hot stone and set them to cool before indulging in a midnight bread snack.

The loaves turned out to be quite large, and could perhaps have benefited from the Jewish tradition of sectioning off a piece of dough to burn in the oven as a gift back to the heavens. (Fun fact: the word “challah” comes from the Hebrew word for “portion,” i. e. portioning off a piece of dough. More neat challah history here.) Instead, I ended up sectioning off a piece of dough to munch on in order to make sure that no great disasters had occurred somewhere in between going crazy with my ingredients and overproofing my loaves. The first slice shocked my palate a bit, as the tartness of the cranberries tricked me into thinking I’d made a sourdough somehow. The sweet potato, although absent in any significant flavor addition, created a lovely moist crumb, and the long proofing period lent the dough a very light and airy quality which was quite pleasant. Next time I would add just a touch more honey, and the balance between sweet and tart would be just right. As it is, I am especially enjoying the tartness when paired with cheese, slathered with butter, or perhaps later made into french toast.

All around, a very enjoyable re-entry into the home bread-making realm, and a nice decadent start to the new year, even if I disregarded a few traditions along the way in favor of using up tasty leftovers.

The quest for the holey grail–pain de campagne

Why do we like holes in our bread? A holey cross-section of meatloaf doesn’t elicit awed gasps from the crowd, nor would one clap joyfully upon discovering a number of lofty air pockets inside one’s cookie–on the contrary, holes in food normally prompt those pesky little questions like “why are there holes in my food?” Swiss cheese is just about the only holey food, other than bread, that is relished for its network of tasteless bits of air. Profiteroles have one giant interior cavity, but this we tend to stuff with tastier things than air, likewise with tubular pastas. Perhaps I am missing some crucial and cherished holey foods (bundt cake totally doesn’t count), but I feel pretty certain that we generally enjoy a nice close crumb on most of our baked goods, and would rather not find air pockets in our chicken parmesan.

It is funny, then, that a matrix of irregular holes is a beautiful sight to behold in a nice country-style loaf, and is a regular measure of a successful bread. Not only do these large air pockets indicate proper fermentation (i.e. a tasty loaf), but they turn the bread into a tool. Try scooping up that last pile of chunky tomato sauce off your plate with a flimsy, tight-crumbed sandwich bread, and you will begin to understand the glory of the holey loaf.

I was in the mood for a nice plate-sopping bread with a thick, crunchy, golden crust and a soft, chewy, hole-filled interior. I turned to the masters of country-style loaves, and paged through Bread Alone by Daniel Leader and Judith Blahnik–a book that I’ve been neglecting in the wake of my Peter Reinhart mania. Leader and Blahnik define pain de campagne as any bread that’s made of a baguette dough but is not shaped into a baguette. While the recipes in this book for baguette and pain de campagne actually do differ in hydration–the latter containing less flour–I decided to stick with the baguette dough recipe in my wild search for the holey grail of breads, and would just play around with the shaping.

To begin, I made my poolish one night ahead of time by combining 8 oz. lukewarm water, 8 oz. bread flour, and 1/4 tsp. yeast. The next day, I took my poolish out of the fridge, and added to it 8oz. lukewarm water, 1/4 tsp. yeast, 20 oz. bread flour (the recipe calls for more, but this was plenty!) and 1 TB salt (which I found to be a bit excessive upon tasting).

I kneaded for nearly 15 minutes and then let my dough have a nice long three-hour rise while I had a nice long three-hour nap in the sun.

For giggles, I shaped my now-doubled dough into a batard/torpedo hybrid and let it proof for a little over an hour.

I sharpened up my knife as best I could, slashed my oddly shaped loaf, and stuck it into the 450 degree oven, adding a little burst of steam for the first couple of minutes. I gave the bread a few rotations while baking, and after maybe 20 or 30 minutes, a nice dark caramel-colored loaf emerged with a ridiculously thick crackling crust.

The moment of holey thruth arrived and I cut into my loaf, hoping to see those completely tasteless but rather pretty and somewhat functional air pockets.

Air pockets I found! Not in numbers worthy of the holey grail bread title, but enough to please my sensibilities and to at least temporarily quench my questing thirst. Although a bit heavy on the salt, the bread itself was most delicious. The crumb was soft and chewy and quite flavorful from the overnight poolish. Lots of sugars had been released and joined forces with the thick outer crust to make it not only heartily crunchy, but also nicely sweet. I enjoyed it immensely when paired with a big daub of butter, but I think that the next time I’m searching for the perfect holey crumb, I’ll bring along some swiss cheese.

I’m spent–from beer comes bread

Beer brewing and bread making are curiously similar. I like to think of brewers as extra patient bread makers who prefer to drink their loaves out of big cups. We both start with water, starch and yeast, and both have one primary flavor addition (hops and salt, respectively). We both extract sugars from our starches, apply heat, encourage fermentation, experiment with new ingredient additions and techniques, and practice a great deal of patience as our products mature. Brewers end up with liquid bread after waiting serenely for what feels like a terribly long time before being able to enjoy the fruits of their labor, and bakers end up with really thick beer after enduring mere days or even hours of patient waiting. Although I do enjoy a good brew, I much prefer my starch-water-and-yeast medley on a plate with a nice little pat of butter or cheese, and I’m happy to leave the careful calculating and weeks of patient waiting to those who really know what they’re doing. That being said, I’m also really curious about the ways in which the bread and beer making processes can inform and contribute to one another. Having already tried putting beer in bread, much to the delight of my taste buds, I figured that it couldn’t hurt to put some of the by-products of beer into my bread and hope for the same tasty results.

I called up my friendly family brewer extraordinaire and hinted that a bounty of spent grains would be much appreciated. Armed with a fragrant container full of spent malted barley and some helpful advice from a fellow blogger (beerevolution), I set to work drying and grinding (read: pulverizing) my grains to make them a bit less bulky and chewy.

My only method of grinding was via my coffee grinder, and, incorrectly assuming this piece of equipment to be cute and demure, pushed the grind button with great enthusiasm. Not only did I turn my grains into something closely resembling peat moss, but crunchy chunks of grain flew literally everywhere.

Not to be deterred by the crunch underneath my feet or the fluff in my bowl, I forged ahead and mixed some ingredients together that I thought would nicely complement the residual malted barley flavor and texture. First I combined 12 oz. lukewarm water with 2 TB molasses and 2 1/4 tsp. yeast. I tossed in all of my ground barley (which had reduced in weight and bulk quite significantly after the oven roasting and coffee grinding debacle, ending up at a whopping 4.25 oz.) I added 3 TB melted butter, 1 TB vital wheat gluten for extra kicks, 2 tsp. salt, and roughly 18 oz. white wheat flour. The dough turned a beautiful deep brown from the molasses and the grains, and was very dense even after a good long kneading session. Luckily some larger flecks of ground malted barley remained and speckled my dough quite prettily.

After about two hours, my dense little dough ball had doubled into a nice big blob.

This I shaped into a boule and let proof for about another hour. Because this dough was so dense due to the added grain, I should probably have shaped it into two smaller loaves–I later found that it took quite a while for this big guy to cook through. Not knowing that a terribly agonizing wait of nearly an hour of baking time awaited me (how do you have such patience, brewers?), I stuck my loaf into a 425 degree oven and waited impatiently to see how it would turn out. I pulled the lovely boule out of the oven a little prematurely in my impatient state, and ended up putting it back in to finish up once I realized my blunder, but not before I managed to slice off a steaming and deliciously moist piece upon which I happily munched while awaiting the final bake.

I loved the color of the loaf and the heartiness of the texture and flavor. I felt like I should have popped open a can of beans and sung some ol’ camp cookie songs.

The malted barley, although already having been processed for beer, still retained some body and a nice little hint of flavor–not only the classic malted taste, but I thought I also detected a very mild and pleasant bitterness. The texture of the grain was really quite satisfying, with crunchy moments puncturing the soft, chewy, moist crumb. The butter and molasses chimed in with a delicate harmony and the whole thing was very nice with a slather of additional butter. I think, considering the density of this loaf, that it was wise to avoid using the spent grains when they were still fully hydrated–I can only image how much more dense it would have been. This is definitely an eat-me-immediately bread that hardens up after a day or two, but fresh out of the oven I rather enjoyed it. I’m definitely intrigued enough to continue experimenting with spent grains, and perhaps one day I’ll throw some hops in there and really make a beer loaf.

“Fast” food–making hamburger buns on the run

Generic hamburger buns are the pits. Not only are they miraculously without flavor, weight, or texture, but they are just so sad to look at. I believe the word flaccid comes to mind. That defeated looking little crumpled exterior, ever so pale, desperately trying to keep its meager innards from floating away like a balloon on a breeze–all the while knowing that life as a bun could be over without so much as the gentle crushing power of a baby’s fist. I don’t understand why we often tolerate such mediocrity in the presence of juicy hamburgers. It’s like hiring an Elvis impersonator to open for Elvis–sure the burger is the main act, but why dilute the experience with an impostor bun? A lack of time always seems to be the driving force behind the hand that grabs that giant bag of fraudulent “hamburger buns.” It is with this in mind that I would like to present you with the story of the accidental time-crunch burger bun. I am a firm believer in the fact that a great bread requires an abundance of time, but there are always occasions when time is scarce–whether accidentally, or by nature of a busy life–and yet you can still achieve a tastier bread than that sad, listless grocery variety.

Knowing that I soon had bun making duties to attend to, I had planned on mixing the full dough one night ahead of time, thereby giving it a whole 24 hours to develop flavor in the fridge. However, I discovered a distinct lack of un-spoiled milk in my fridge on the evening of dough making, and was forced to re-think my plan. Rather than make a milk-less hamburger bun, I decided to mix up a small starter that I could then add to my dough the next day when grocery stores were open and milk was available. This way I could still at least get a flavor boost from a day-old pre-ferment, even if I couldn’t let the whole dough enjoy a nice long fermentation.

I combined 6 oz. flour, 6 oz. water, and 1/4 tsp. yeast, and set the pre-ferment in the fridge to bubble away.

The next day my plans were once again thwarted when I stayed at work a bit longer than expected, and didn’t even begin to mix my final dough until 3:30, knowing that the buns were supposed to be out of the oven and onto a table in a house 40 minutes away by 5:30. I figured if I timed things just right and manipulated my bread’s environment a bit, I could just make it, and with a decent bread to boot. I turned to my chosen recipe, which came from the hilariously named Bread Winners Too: The Second Rising by Mel London, and got to work. I split the recipe in half, as I didn’t really want 32 large buns, and I measured in ounces rather than cups. I also accommodated for the additional liquid content of the pre-ferment by adding a bit more flour.

I began by heating together 10 oz. milk, 2 TB vegetable oil (I would have preferred butter, but I actually only had olive oil, so into the pan it went), 2 TB honey, and 1 tsp. salt. I dissolved 1 TB yeast in 4 oz. warm water. I combined both of these mixtures with my deliciously fragrant pre-ferment.

To this I added one whole beaten egg, and a whole lot of flour. By the time I had finished adding in all the flour that the dough needed to reach the right consistency, I had used 22 oz. white wheat flour, and 8 oz. whole wheat flour. The original recipe, from the kitchen of farmer Connie Hartland, called for all whole wheat flour, but I personally prefer a bit of a blend. After a 10 minute knead, the dough was elastic and glistening prettily from the olive oil.

While at this stage, I would have loved to have stuck the whole thing in the fridge to ferment overnight, I instead covered it up and strapped it into the back seat of my car where it was treated to a nice little joy ride to the kitchen of its ultimate demise.  Thankfully, my car had been sitting in the sun and was quite toasty–really quite an ideal place for bread to rise rapidly if you’re in a hurry. Also thankfully, the recipe I was working with called for an abundance of yeast, which meant that the dough was designed to be a rapid riser and not a slow fermenter.

After 40 minutes in the hot car and another 20 minutes in the new locale, I knew I had to start shaping the bread if it was to be baked in time for dinner. The dough hadn’t totally doubled, but I threw all caution to the wind for the sake of a timely meal and started speed-shaping. Soliciting help, we tore off 4 oz. chunks and rolled them into itsy bitsy baguettes before tying them into knots that could easily have been rivaled by the work of a kindergartener tying his shoes. These were brushed with olive oil and recklessly topped with sesame seeds that went everywhere but the tops of the buns. I employed another time-crunch short-cut and stuck the buns into the oven just before I turned it on, allowing them to have an accelerated proofing period as the oven warmed up from room temperature to 350 degrees.

As the oven warmed and I incessantly peeked in on the little knotted guys, I began to fear that they had been subjected to time-saving methods a bit too harshly, and that they might be a flop. Just as I believed my fears to be affirmed, the buns began to expand like little doughy puffer fish–all that extra yeast pulling its weight in the final moments. A nice golden crust emerged, and I sighed with relief.

A final brushing of olive oil, post-baking, added a lovely luster to the already golden tops. Unfortunately I once again neglected my photographic duties as soon as I was presented with the opportunity to eat, and therefore cannot show you what these little guys looked like on the inside. The interior was beautifully dense, much like a bagel, with a tight network of tiny air bubbles making up a very soft and moist crumb. The flavor was actually quite developed–thanks to the pre-ferment and to the hearty combination of whole wheat flour and honey. Although I am sure the buns would have been loftier and more deeply flavored given a proper rising time, they were quite pleasingly delicious and toothsome as they were. Instead of being a squishy and flavorless means of holding and devouring a hamburger, these little buns provided some serious sandwiching action and harmonious flavoring for beautiful, heaping piles of pulled pork (and for me a beautiful heaping pile of veggie burgers.)

Here’s to you, Mrs. Roosevelt

Were it not for Franklin and Eleanor Roosevelt, the home baker might still be suffering under the culinary tyranny of bland dinner rolls. Luckily, the presidential couple–evidently enamored of the Parker House Hotel’s extravagantly buttery bread offering–requested that a copy of the guarded recipe be sent to the White House kitchen. I can sort of see the appeal of recipe secrecy, but when the president of the United States rings you on the telephone and says he really likes your dinner rolls, and would you be so kind as to share your state secret with him, the game is kind of up. Needless to say, since this happy day in 1933, the Parker House roll recipe leaked into the home kitchen in various forms and to various degrees of authenticity, and began to butter people up all across the country.

I know I posted about rolls in the not-too-distant past, but I’ve been wanting to see what the fuss is all about with these Parker House rolls for a long time. According to the Parker House’s rather distinguished guest list (as culled from a brief online history blurb) it is quite possible that the following people munched merrily on this delicacy at one point in time: Ralph Waldo Emerson, Henry David Thoreau, Henry Wadsworth Longfellow, Charles Dickens, Babe Ruth, JFK, Ulysses S. Grant, the aforementioned FDR and his lovely wife Eleanor, Judy Garland, and the infamous John Wilkes Booth. What’s more–and this really floors me–Ho Chi Minh worked as a baker in the Parker House kitchen, and Malcom X as a busboy. So I would suppose that they were also munching on Parker House rolls on their lunch breaks. The list of famous potential roll-eaters goes on and on, which is to say that if all of these distinguished folks were fueling their political, poetic, theatrical, philosophical and literary conversations with these rolls, then they must be packing a hell of a punch.

Before it occurred to me that I could likely find the original recipe online and make the rolls in their most authentic form, I found a nice little recipe in Beard on Bread. I am glad that I decided to work from this version, because it turns out that the original calls for an even more absurd quantity of butter than that with which I was currently confronted.

I cut Mr. Beard’s version of the Parker House roll recipe in half, measured in ounces rather than cups, and generally mucked about with the construction of the dough, but the recipe is still fundamentally his. To begin, I made a small poolish, because even when you’re creating an enriched dough, it’s always worth it to add extra fermentation flavors. I combined 1 tsp. yeast with 4 oz. water and 4 oz. flour and let the whole thing get nice and bubbly over the course of a few hours.

Instead of making a sponge, as Mr. Beard next instructs, I finished mixing my dough completely after adding the poolish, since using both a sponge and a poolish would be unnecessary and would exhaust the yeast. (I suppose I could have just followed his instructions and skipped the poolish, but I wasn’t reading far enough ahead to realize that he already had this step covered).

I added 1 1/4 tsp. yeast to 8 oz. warm milk. To this I added my poolish, 1/4 stick melted butter, 1 1/2 tsp. sugar, 1 tsp. salt, and about 13 oz. flour.

I kneaded away on a nice spacious counter top in a not-so-tiny (i.e. not my) kitchen until the dough was soft and supple.

I had made the dough early enough in the day that the final rise could be a colder, slower rise, allowing a few more flavors to develop during this step. Since the day was so warm, it was actually a challenge to find a cool enough spot for the dough to rise slowly. Luckily, my guest kitchen was outfitted with a handy little tool that I now wish to add to my own collection of trusty gadgets, and that aided my quest for the perfect temperature.

After taking a nice long while to double in size, my rich dough was ready for some exercises.

Instead of shaping each roll into the traditional Parker House shape, I stuck with my personal favorite–the pull-apart roll–and forced all the little dough balls into cramped quarters.

Again, I made use of some cooler temperatures to slow down this final proofing stage, and stuck the whole unit in the fridge until it was baking time. The rolls were clearly very eager to hop in the oven because even in the fridge they climbed rapidly up the sides of the baking dish and rose with alarming speed. At the last minute, I brushed the whole lot with a slather of butter (just to appease the Parker House roll gods) and stuck them into a refreshingly large oven, set to 375 degrees.

After maybe 20 minutes or so, a golden island of dough had begun to peek over the top of the dish and the sight was most pleasing.

Unfortunately, at this point, I became so engrossed in the act of eating dinner that I neglected to photograph the beauty of the interior bits. Suffice it to say that this roll is not for the faint of palate. The light, fluffy, tender crumb with a brilliant network of tiny air holes disguised a killer rich flavor, replete with sweet, milky, buttery goodness. As the reigning vegetarian at the table, I found that the rolls became my primary meat substitute–not for lack of other delicious dishes, but simply because they seduced my taste buds. I now completely understand why, according to the record, composer Jacques Offenbach broke into song when devouring these lavish rolls at the Hotel, singing “Parker rolls, Parker rolls, how I love you.”

Zymurgy–get some in your life (or your bread)

I never thought about the possibility of this occurring, but today, I looked up a specific word in my trusty Oxford American Dictionary and it just happened to be the very last word in the dictionary. I felt like I’d won a prize and that bells would start clanging and confetti would rain down on me as my finger rested triumphantly on this famous last word. No such thing happened, but it was somehow a very satisfying experience to have sought out the last alphabetically-ordered word in the English language. I thought it would be an obscure and scientific-sounding consonant cluster like Zzyxglene XZ-2 or something. Instead, it is a pleasant little word that is just as fun to look at as it is to say: zymurgy. And this whole story would be completely irrelevant if not for the fact that zymurgy is the study or practice of fermentation. Which is to say, in a roundabout way, that today’s bread made really excellent use of the fermentation process. So much so that I was inclined to poke around and read more about fermentation, naturally leading me to this excellent word, which is one that I will now almost certainly try to use in conversation at least once in life.

What made today’s bread so delicious was that two fermentation approaches were utilized in one dough. Not only was the signature Reinhart move employed (overnight refrigeration) but so too was a starter used. In this case, the starter was a pâte fermentée, which, unlike a biga or a poolish, is a legitimate and complete bread dough in itself. Since I didn’t have any old leftover dough to pop in my new dough, I made a small fresh batch and let it ferment at room temperature for a good long while (although an overnight in the fridge couldn’t have hurt the flavor). Armed with this bubbling beauty and a plethora of ingredients, I was ready to tackle Reinhart’s Pane Siciliano, which I consider to be the most beautiful loaf in all of The Bread Baker’s Apprentice.

I took my 16 oz. of pâte fermentée, and mixed it up with 12 oz. lukewarm water, 1 1/4 tsp. yeast, 1 TB honey, 2 TB olive oil, 1 1/4 tsp. salt, 8 oz. semolina flour, and 8 oz. bread flour (I ended up kneading in quite a lot more bread flour before the dough felt just right.)

At this point I could already tell that the bread was going to be scrumptious just because it felt so heavenly underneath my palms. I could have carried on kneading all night, but stopped myself after the usual 10 minutes, and left the dough to ferment at room temperature until it doubled.

I took my doubled dough and chopped it into three pieces (with ease, might I add, thanks to the generously gifted dough scraper). I then began the process that attracted me to this particular loaf in the first place: rolling and spiraling!

I think I am going to shape every subsequent loaf into a spiral for the rest of my bread making days. It is very satisfying and I suggest you give it a go. I stuck my three scrolls into the fridge after covering them with a bag to retain the moisture, and let the second part of the zymurgy magic take place overnight. When I pulled the dough out of the fridge the next day I found that my bread had somehow over-proofed a bit in my fridge. Instead of nice svelt periwinkles, I had a tray full of chubby rogue snails living life on the edge after having busted through their shells. Apparently, my fridge likes to freeze the mesclun mix on the top shelf, but is happy to provide my bottom-shelf dough with enough balmy weather to induce rapid overnight inflation. Luckily, the over-proofing wasn’t drastic enough to cause deflation, so I quickly sprinkled some sesame seeds on top and popped those snaily monsters into the 450 degree oven.

Before long, the fruits of the fermentation labor paid off, and a beautiful golden crust formed from all of the freed sugars within the dough. The scroll shape got lost in the baking, as I assumed it would after the over-proofing blow-out, but the bread still had a nice oven rise and looked quite lovely.

The crust was thick and crackly and caramel colored and it warmed the cockles of my heart, whatever those are.

If you’ll excuse another etymological tangent, I just happened to glance at the dictionary again to see what it had to say about the cockles of my heart. Instead of finding my answer,  I found that cockle (the verb) means to “bulge out in certain places so as to present a wrinkled or creased surface; pucker.” And wouldn’t you know it, this derives from the French coquiller, which is to “blister [as] bread in cooking.” Well, well, dictionary, you certainly have been most enlightening today. I still don’t know why we refer to the cockles of our hearts (perhaps because cockles are bivalves, and our hearts have valves…?) but I like to think that cockled bread warms my heart anyway.

Cutting into this loaf was quite lovely, as a symphony of crackles was unleashed against the edge of my bread knife. The crumb was light and tender (although a little less lofty than it should have been, again due to the over-proofing) and just begged to be spread with a pat of butter. This I did in short order, and was soon munching on a really, really tasty piece of bread.

I have to say that this is probably my absolute favorite bread so far. I love the flavor of the semolina flour, the gentle contribution of the olive oil, and the delicate sweetness of the double fermentation. The texture was both chewy and soft and the crumb was so moist. The sesame seeds were an excellent added crunch, but the real star of this loaf was the flour itself. If I ever doubted before, I certainly won’t again–time is the most important element in creating a delicious loaf of bread. When in doubt, ferment! (Or zymurgize?)

Let them eat brioche!

Forgive me, history buffs. I’m going to hop on the misinformation train and rehash Marie Antoinette’s catchy but probably completely bogus little phrase “let them eat cake,” or, as in my favorite Gary Larson cartoon version, “I said, ‘let them eat cake and ice cream!'” Sure, she probably never said it. Especially not in English. But, somewhere in history, that fun little phrase cropped up, and regardless of its misattribution, or complete fabrication, the English translation got all mixed up. Whoever was trying to solve France’s hunger problem with a zippy one-liner actually said (so they say) “let them eat brioche.” Brioche occupies a happy little space somewhere between bread (of which the peasants had none) and cake, or pastry. I suppose this means that it’s slightly less offensive to snarkily offer up brioche as a solution to the hunger of the masses than it is to offer cake. However, the more money in one’s pocket, the more butter in one’s brioche, making this a universally eaten but not a universally rich foodstuff. According to Peter Reinhart, a “poor man’s brioche” was only 20-25% butter, whereas as a “rich man’s brioche” was upwards of 70% butter.

What I made today would qualify as a poor man’s brioche by these standards, weighing in at exactly 25% butter. Just as I got to feeling sad for the poor men and their butter-deficient brioche, I tried a nibble. I’m not sure what kinds of taste buds these folks had, but 25% butter was pushing even my butter limits, and I consider myself to be way beyond the realms of the butter tolerant. What’s more, I had enough trouble hand mixing this “small” amount of butter into my dough, and I can only imagine those poor French bakers, without the help of a nice retro-blue Kitchenaid, trying to hand knead a dough composed of 70 or 80% butter.

The recipe I used today comes from Linda Dannenberg’s exquisite and endlessly tempting Paris Boulangerie-Pâtisserie–a book that is on loan to me and that makes me want to buy a one-way ticket to Paris every time I open it up. This pain brioché recipe comes from Bernard Ganachaud of La Flute Gana boulangerie in northern Paris. I cut the recipe in half, and measured in ounces rather than grams.

To begin, I mixed 1 tsp. yeast into 1 TB warm water while I heated up 3 oz. milk. In a bowl, I measured out 8.8 oz. all-purpose flour. I made a well in the flour and poured in the milk and the yeast mixture, as well as 3/4 tsp. salt, 1 large egg and  3/4 tsp. vanilla sugar (I had no vanilla sugar, so I followed the instructions and added 3/4 tsp. sugar and 3/8 tsp. vanilla). It was at this point that one step went very wrong, and one step went very right.

First, my large egg, which was previously sitting happily on my countertop, decided to succumb to some odd horizontal gravitational force, and rolled at least a foot across my counter before the more legitimate vertical gravitational forces facilitated a nice downward fall and a satisfying splat. This wouldn’t have been terrible if I had just scrapped the egg and grabbed a new one out of my fridge. Instead, I thought that the shell had remained intact enough to be salvaged, and I scooped it up, finished cracking it open, and added it to my dough. As soon as I did this, I looked on the floor and realized that a pretty substantial amount of egg white had sneakily leaked out, and that my dough would probably suffer from this small but important lack of moisture. Nevertheless, for some reason, I didn’t try to accommodate for this blunder. Hmm. Possibly because I was too distracted by the next happy event that occurred: I opened up my brand new bottle of Tahitian vanilla extract, having come straight from Tahiti itself, courtesy of my generous big bro. The hue was a rich golden amber, the liquid was almost as thick as a syrup, and it smelled like heaven. I wanted to tipple from the bottle, but remembered my own (and everyone else’s) disappointing childhood discovery that vanilla is not really for lone consumption.

Giddy on the fumes of this lovely stuff, I gave the dough a rough mixing with my fingers, and of course found that it was a bit too dry. Clearly I didn’t have the presence of mind to crack open a new egg and lend a little more egg white to the mixture. Instead, I moved on to my next step, which was to combine 2.2 oz. soft butter with 1.6 oz. granulated sugar. I then added this to my overly dry mixture, bit by bit, until it came together into something resembling a dough. The whole thing then went into the fridge after sitting out at room temperature for a little over an hour. In retrospect, I know that I didn’t really execute this whole thing properly–I didn’t knead enough at either stage to get a properly soft and elastic dough ball, but tried to make up for this with a brief kneading session this morning when the dough came out of the fridge. I’m not really sure what I was thinking at the time, but all’s well that ends deliciously.

The dough sat at room temperature this morning for about an hour, at which time it decided not to do much at all, and I was afraid that I hadn’t developed the gluten enough during my vanilla-induced haze for the yeast to work its magic. I forged ahead fearlessly, and began forming my dough into brioche à tête using a muffin tin instead of the pretty little fluted tins, which are absent in my kitchen. These rotund little fellas with their small dough heads got a quick egg wash, and spent some time in my 350 degree oven.

After maybe 15 or 20 minutes, the coils on the roof of my oven had toasted the little guys’ heads pretty seriously and so I pulled them out, the larger body of the dough thankfully having finished baking too. Miracle of miracles, they still puffed up nicely despite my less than superb dough handling.

To keep myself from popping a piping hot brioche straight into my mouth, I put some espresso on to brew while I waited for things to cool off. I definitely wasn’t expecting magic when I took my first bite of the shiny brown brioche nubbin, having felt pretty skeptical about my treatment of the dough the night before. However, my first bite was pretty darn exciting. To begin with, there is something very satisfying about eating that little round top bit–it just tears off so nicely and is cute and bite-sized and tantalizing. I wasn’t so surprised about this fun-factor, though. It was more the actual flavor of the dough that played a belated April fool’s joke on me. The bread looked ok, but it wasn’t as soft and fluffy and rich as I imaged a brioche might appear, and so I just assumed that the flavor would follow suit and be a bit boring. I also thought it would be a bit chewy from a late kneading. Considering the amount of butter, sugar, and milk that went into the dough, I suppose I shouldn’t have been surprised, but the flavor was absolutely delicious! There was a nice soft crunch on the crust, and the crumb was as moist and tender as the day is long. I kept tasting the dough trying to put my finger on what made it so pleasing, and I finally realized that it was the vanilla that kept cutting through the richness of the butter and the sweetness of the sugar to put on a private show for my taste buds. The flavor of the vanilla had a depth and complexity that I’ve never experienced before, and that held up spectacularly through the whole ordeal. Paired with a fresh cup of espresso, this was a pretty serious way to wake myself up on a lazy Sunday morning.

Whether or not anyone actually suggested that the hungry French peasants eat brioche in lieu of normal bread, I can see how this would be a bit of a kicker–who wouldn’t want to eat butter drenched sweet breads shaped like little round people if given the choice?

A corny journey–from quick bread to yeasted bread

I don’t know about you, but I don’t fancy the idea of cutting into a nice thick slice of yeasted chocolate cake, or dipping yeasted muffin bits in my coffee in the morning. I much prefer to get my leavening kicks from baking powder in these particular instances. Its distinct lack of flavor is a definite selling point. Despite the fact that yeast and baking powder perform the same primary function, many recipes have rather exclusive guest lists, and these two ingredients are almost never invited to the same party. These exclusions aren’t necessarily drawn along categorical lines–for example, we welcome yeast in our breakfast repertoire when it is puffing up a cinnamon roll dough, whereas we prefer our scones to be leavened with baking powder. Furthermore, we’re happy to sprinkle some yeast in a king’s cake, but wouldn’t dream of using yeast to leaven a carrot cake. Somewhere along the line it seems to have been collectively determined where and when these two rival ingredients might appear–a decision driven, no doubt, by both expediency and flavor.

There comes a rare time when the same group of ingredients may be joined by either party and a good time is still had by all. Today I happened upon such an anomaly, and decided to invite Mr. Yeast along for the ride, leaving Mr. Baking Powder at home in the cupboard. I speak, of course, about corn bread. When corn is in our bread, it is most often joined by baking powder and eaten with profuse amounts of butter and chili, but yeasted corn bread sounded just as delicious to me, if not a bit more time consuming. Yeast is certainly the slow-poke of the leavening family. James Beard had a lovely looking cornmeal bread recipe in Beard on Bread in which yeast was used, and I thought I would give it a whirl. Besides, I am still trying to use up my ambitious Bob’s Red Mill purchases, among which medium-grind cornmeal featured prominently.

I got some water boiling and began making my dough: (I cut the recipe in half and measured by weight rather than by cup, but this is still Mr. Beard’s recipe.)

I first combined 4 oz. boiling water, 1/2 tsp. salt, 1.5 oz. cornmeal and mixed until the cornmeal was mostly hydrated and thick (my particular cornmeal had a slightly different hydration ratio than that used in the original recipe, but I just ended up pouring off the extra liquid).

I then mixed together 2 oz. warm water, 2 1/4 tsp. yeast, 1 1/2 tsp. granulated sugar, and added this to the corn mix.

This was joined by 4 oz. milk, 1 tsp. additional salt, 2 TB brown sugar, and about 14 oz. white wheat flour. (In reality, I had no milk, but upon discovering some 1/2 & 1/2 in my fridge, I diluted it with a bit of water to make some 1/3 & 1/3 & 1/3 and figured that it would resemble milk closely enough.)

I kneaded everything together for a good long while–probably 10 or more minutes–and then left it to rest.

After almost 2 hours, my dough’s girth had doubled and it was ready to be deflated and shaped.

There wasn’t quite enough dough to warrant the use of this lovely ceramic loaf pan, but I used it anyway because its ability to bake things evenly is irresistible. I let the dough proof for another hour, at which point it was trying in earnest to scale the pan’s walls, and then I popped it in my 425 degree oven. After 10 minutes at the higher temperature, I reduced the heat to 350 and let the loaf continue its transformation for another 20 or 30 minutes. Although there was no way that my tiny amount of dough was going to rise over the top of the pan and create that pleasant muffin-top-spill-over look, I got a good rise out of the little fellah, and it came out looking golden and soft and delicious.

Having just feasted on Newman-O’s, I didn’t have too much of a problem being patient and waiting for the bread to cool before sampling a slice. After digesting my cookie entree for a while, I was ready to weigh in on the “yeasted” versus “baking powdered” corn bread issue, and I sliced into the lovely soft loaf. It had a very smooth and even crumb, typical of a milk bread, and a nice mildly thick crust providing a little contrast.

Despite the visual similarities to milk bread, my first bite revealed a very different and pleasant texture, which was, of course, no surprise as I had added cornmeal to the dough. There was something really satisfying about the way the yeast flavor and the corn flavor interacted, and the rich sweetness of the brown sugar chimed in for a nice three-part harmony. The milk and salt and flour had their own supporting trio going on in the background and it was just a lovely little flavor performance all around. Since I had used a medium grind cornmeal, there were a few coarser bits of corn that accented each bite with a toothsome crunch while the smaller grounds were absorbed into the supporting body of the bread–a very enjoyable chewing experience.

Since the character of this yeasted corn bread is very different from a traditional quick corn bread, the two aren’t really vying for the same gold medal and the leavening rivalry can be forgotten–each corn bread has merits of its own. This particular loaf I would like to use for sandwich bread, or as a vessel for toad-in-a-hole, or even as a cinnamon-sugar toast candidate, whereas traditional corn bread begs to be eaten with a hearty dinner dish, or simply on its own with butter. Depending on your time allowances and your flavor preferences, you now have two delicious choices when faced with a corny hankering.

You stay classy, Irma Rombauer

I realize that there are some pretty serious pizza dough pioneers out there, but I would like to submit that our very own Irma, of the immortal Joy of Cooking, knows a thing or two about making a pie in a pinch. Obviously, in an ideal world–where all doughs are fermented to perfection and flavors abound from the flour alone, aided only by a few choice additives–I would have had enough foresight to make my pizza dough eons before I needed to bake it, thus providing a sufficient time frame for said fermentation. However, in a realistic world, I found myself in need of a pizza dough about three hours before I knew I would find myself in need of a pizza. Since I’m not willing to starve myself in the name of fermentation, I turned to Irma and her pretty stellar pizza dough recipe for those who can’t plan ahead.

In a jiffy, I combined:

10.6 oz. water

2 1/4 tsp. yeast

17-18 oz. white wheat flour

1 TB vital wheat gluten (this I added just for giggles to give my dough a protein boost and to hopefully enhance the texture)

2 TB olive oil

1 TB salt

1 TB granulated sugar

I kneaded for a good 10 minutes and ended up with a nice soft dough.

There is a fair amount of yeast in this dough, since it is intended to be a quick riser and not a slow fermenter. With this in mind, I didn’t mind taking the cheater’s time crunch route by sticking the dough in my slightly warmed-up oven to expedite the rising process. I knew I wasn’t going to get a lot of flavors out of the flour, and I was ok with that–the dough was still going to be lovely and delicious. In Rombauer I trust. After about two hours in the warm oven, the yeast gang had used its force to expand into the glutenous strand territory, and it was ready for some toppings. They say a pizza is only as good as the crust, but there is really no denying that delicious toppings are kind of important. Homemade red sauce, a nice sharp cheddar, and some Applegate pepperoni (for the pepperonitarian in us all) got nice and friendly with the beautiful, smooth olive oily dough base. I intentionally added as little flour as I felt comfortable using when making the dough so that it would be elastic and supple and easy to stretch, and it definitely met these expectations.

It’s a bit hard to see what the dough is like under this sea of meat, but I can affirm that it felt and looked very promising for a two-hour quick crust. I stuck this smothered masterpiece into a 425 degree oven and baked it for what felt like a good long time, although I don’t honestly remember how long it took (perhaps 30+ minutes?) When it emerged it was crisp and crackling and all kinds of melty.

The dough puffed up just enough to provide a sufficient base for the cheesy madness going on above, without being overwhelmingly thick and messing up my preferred crust to toppings ratio. The whole thing was chopped up and demolished with great immediacy, and I almost forgot to stop and take a moment to evaluate my crust–the only part of the pizza that actually pertains to my flour, water and yeast theme. From what I remember in my pizza delerium, the crust was nice and crunchy on the outside, and soft and rich on the inside. It had a definite flavor (i.e. yeasty, olive oily and salty) that supported the tasty trio on top quite nicely. A lot of quick pizza doughs end up very, well, doughy and thick and flavorless. This particular dough could almost have fooled me into thinking that a bit more time had been invested in it, as the texture and flavor were both so pleasant. Alas, my short term memory isn’t so terrible as to forget that the dough had only been started a matter of hours earlier.

I accept the fact that not all doughs are created equal, and that a dough that’s been given a long fermentation at a lower temperature will always out-perform a quick dough. However, it’s impossible to replicate a 24-hour fermentation in only 3 hours, and, being human, we sometimes need dough in a pinch. In these instances, I find that Irma is my go-to pizza dough lady, and I am more than happy to crack open the Joy and use it as it was intended to be used–for regular ol’ people making regular (or even stellar) ol’ meals.

The name game–vaguely Victorian bread

“Here is your plate of green stuff, sir, and here is your bowl of warm mushy vegetables in water.”

“Ah, yes, thank you very much. For my entree I think I would like the ribs of the cow please.”

“Very well, that will come with a side of cooked cereal grain, and I will refill your glass of musty juiced grapes in just a moment.”

I suppose it makes a lot of sense that we don’t speak about food so literally, there being a pretty staggering number of edible items to distinguish between, but sometimes I wonder a bit about the names we come up with for the things we ingest. For example, the recipe I looked at for today’s bread is entitled “Victorian Milk Bread.” I am sure that the Victorians loved putting loads of milk in their bread, and that the S-shape of this particular loaf may have been popular at the time, but I don’t think that I was really reliving the Victorian glory days when I mixed together these few simple ingredients and let them ferment. Sure “Victorian Milk Bread” sounds much better than its generic brother “Blah Bread from Nowhere,” and it conjures romantic images of ladies with fans at fancy parties munching on milky bread. And while there are certainly very many legitimately named historical breads, I think if we are being honest here, the Victorian ladies probably weren’t nibbling on this particular loaf.

Perhaps I’m completely off base, and I have just verbally defiled a sacred and historic bread formula. Or perhaps we really do just feel a burning desire to whip out our thesauri and pull vaguely historical names and foreign sounding terms out of chef’s caps when we whip something up in the kitchen. After all, making and eating food is an art, and naming it might as well be an art too. Either way, as a kid who wanted each piece of broccoli named after a tree before it could be consumed, I am really in no place to judge. Also, this bread tastes really good, so Victorian or not it is a worthwhile endeavor.

This lovely loaf came from Bread by Eric Treuille &Ursula Ferrigno (and I mean no disrespect to these brilliant authors in my namemongering!)

I cut the recipe in half in order to avoid having great excesses of bread such as those that kept me from making more bread this last week. I also gave this dough the Reinhart treatment as I am wont to do these days. Last night, I mixed together:

1 tsp. yeast

1/2 tsp. granulated sugar

6 oz. warm-ish milk

3/4 tsp. salt

9 1/2 ish oz. bread flour

I kneaded this soft ball of dough for nearly ten minutes, as it grew only softer and more pleasant to handle. This supple quality was most directly due to the dairy, but I would like to think that my new Bob’s Red Mill flour added some magic to the mix.

The sugar that is added to this dough is almost negligible, so the milk is the only real enrichment. Although milk is certainly flavorful, it is not overwhelming and it affects the texture of the bread more than the flavor. What this meant to me was that it would still be important to draw out as much flavor from the flour as I possibly could–something that is not often as important in enriched breads. With this in mind, I departed from the recipe’s procedural guidelines and stuck the dough in the fridge overnight for a nice slow fermentation.

As per usual, I took the dough out of the fridge after work today and let it finish doubling in size at room temperature. Once the dough had become nice and lofty–a process that took a few hours–I began shaping. It was at this point that I decided to give my bread further fodder for an identity crisis by abandoning the Victorian S-shape. I really wanted dinner rolls, and I could tell that this supple puffy milky dough really wanted to be made into dinner rolls too. So I listened, and I rolled a bunch of little dough balls into a happy dough ball family that proofed nicely into a bigger dough ball family in about 45 minutes.

After a nice little vacation in my 375 degree oven, the dough ball family returned all tan and beautiful, smelling pleasantly.

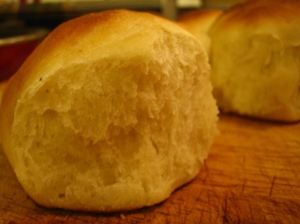
In a very satisfying little maneuver, I tore off a hunk of bread and saw a dreamy, steaming interior, the likes of which I envisioned when I jumped ship on the S-shape idea in favor of dinner rolls.

They tasted dreamy too–a really excellently developed wheat flavor balanced by a mild yeasty kick, all wrapped in the warm embrace of soft fluffy milk magic. A little salted butter melting into the beautiful network of tiny air holes was really excessive and delicious. So delicious, in fact, that I was seized with the sudden urge to flip through my thesaurus and to google vaguely historical reference points in search of the perfectly noncommittal epithet.